Pre Wash Guide
A solid pre wash can make all the difference when it comes to car care. Minimising any contact made with the painted surface of yor vehicle will help to drastically reduce the risk of causing microscopic surface scratches that lead to a lower gloss level over time. Follow along to our simple guide and help your vehicle keep that show room shine.
Pre Rinse
The rinse step of this routine is one of the most important. It will ensure that loose dirt and grime is removed from the panels before you make an attempt of contact. If this step is rushed the dirt that has not been removed could cause damage to the paintwork which will require further steps, therefore will take more time. To make sure that you carry this out safely we always recommend working from the top of the vehicle down, this ensures that the grime and traffic film that you are removing only travels down and off the panels you are rinsing, suspended away from the panel by water. Don’t forget to rinse out any panel gaps and areas with a high build-up of grime. The more dirt and grime you remove, the safer the rest of the routine will be for your paintwork. Now would also be a good time to clean grime from inside the door shuts, fuel filler and wheel arches. For this we could recommend using a detailers brush and an APC or citrus solution at the correct dilution rates. Spray onto any soiled surfaces and leave for a short time to dwell, then agitate gently to remove any grime with a soft hog hair detailing brush. Finally, swill with a steady flow of water, it is always important to remember not to use very high pressure or to work to close to the surface with your pressure washing system through every stage of your wash routine.
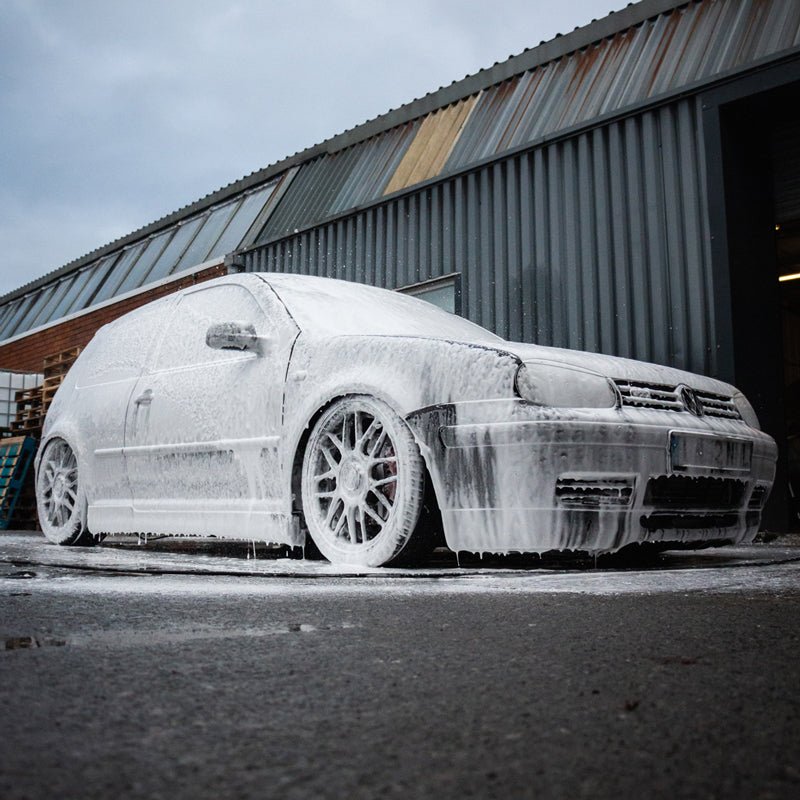
Pre wash/Snowfoam
There are a few stages of pre wash that you can carry out to further clean your vehicle before you make contact with the delicate painted surface. Once you have a solid pre rinse carried out it's now time to focus on the vehicles surface itself. Firstly, it is good practice to use a dedicated citrus pre cleaner to target clean any fly splatter on the front end and mirror covers to help gently loosen these away from the surface safely. You may also find it beneficial to apply a citrus pre cleaner to the lower half of the vehicle and even the rear end at this time. Once you have applied your citrus pre cleaner, allow this to dwell for a few moments, there is no real benefit from swilling at this time. It is now time to move over to your snowfoam.
Snowfoam's are generally a pH neutral or mild alkaline solution that are sprayed onto the complete vehicle via a foaming lance setup which once in contact with the surface will help to break down any grime left on the panels. When the snowfoam gets to work it will gently loosen bonded contaminants whilst slowly and safely transport these down the panels in the suspended foam off the vehicle. This step is very important because it removes any dirt that could later get caught in your wash mitt and scratch the surface of your paintwork which will degrade your gloss levels. Typiclly you will add 100ml of snowfoam to your 1 litre snowfoam lance bottle and then top the rest up with warm water. It’s worth noting here that with a full 1L of solution you should be able to snowfoam at least two vehicles. If you do not have a snowfoam lance, then you could use a kwazar foaming sprayer to apply the snowfoam. Snowfoam should be applied evenly to all exterior panels working from the top to bottom, we are not looking for the thickest foam possible just a good even coverage. You should leave the snowfoam to dwell to allow it to get to work safely lifting any contamination away from the panel for 5-10 minutes, but while you are waiting why not go around the intricate areas like badges and mesh grills with a soft detailing brush. After your dwell time is up or the majority of your snowfoam has made its way down the vehicle, you can now thoroughly rinse the vehicle to remove all of the snowfoam, again do not use very high pressure here, you're simply removing all of the loose product to allow you to carry on with the process. If the vehicle is still lightly soiled, you can repeat this step if you desire. Keep in mind that a good solid pre wash should remove almost all contaminants without you even needing to make contact with the painted surface.


1 comment
Brilliant, I found that carrying out this Pre- wash you can normally use just the 1 wash bucket.