Here at AutoGlanz we believe that a solid wash routine is the backbone to maintaining the perfect finish. If you are just carrying out a regular maintenance wash or even completing a decontamination wash, before committing to a full correction, it is vital that you use the correct methods and techniques to fulfill this stage correctly, the foundation to the perfect finish. If the method is done incorrectly, then you could end up with a lot more work on your hands. By following our step-by-step guide you will be giving your paintwork the best possible chance to stay in showroom condition!
The rinse step of this routine is one of the most important. It will ensure that loose dirt and grime is removed from the panels before you make an attempt of contact. If this step is rushed the dirt that has not been removed could cause damage to the paintwork which will require further steps, therefore will take more time. To make sure that you carry this out safely we always recommend working from the top of the vehicle down, this ensures that the grime and traffic film that you are removing only travels down and off the panels you are rinsing, suspended away from the panel by water. Don’t forget to rinse out any panel gaps and areas with a high build-up of grime. The more dirt and grime you remove, the safer the rest of the routine will be for your paintwork. Now would also be a good time to clean grime from inside the door shuts, fuel filler and wheel arches. For this we could recommend using a detailers brush and an APC or citrus solution at the correct dilution rates. Spray onto any soiled surfaces and leave for a short time to dwell, then agitate gently to remove any grime with a soft hog hair detailing brush. Finally, swill with a steady flow of water, it is always important to remember not to use very high pressure or to work to close to the surface with your pressure washing system through every stage of your wash routine.
WHEELS
We like to carry out this step now so that we do not get any contaminants or cleaners from the wheels onto clean paintwork, some like to carry this part of the routine out whilst the pre wash or snowfoam is dwelling. As with all detailing steps there can quite often be several ways to achieve the same end result and we always encourage customers to do what feels more natural to them. If your wheels are heavily soiled with brake dust and bonded contamination, we would recommend carrying our a pre wash with a non acidic wheel cleaner, simply apply the wheel cleaner, leave to dwell for a few moments then adgitate with a detailing brush or wheel brush. Once you have the majority of the soiling removed one additional step that could further more decontaminate your wheels would be to apply a reactive iron fallout remover to assist in the removal of any baked on iron contamination fallout (brake dust). take a look at our decontamination guide to learn more about fallout removers and decontamination in general. If your wheels are relatively clean and free from a large build-up of brake dust, then we would suggest using a soft detailing brush and some shampoo in a bucket, or a dedicated wheel cleaner, (fallout removers should only be used when any other means of clean does not yeild the desired results) At this stage the wheels should already be wet from the Pre Rinse, if this is the case then gently agitate any grime on your wheels with the soft detailing brush regularly rinsing it in the bucket of water and shampoo. After you have completed this step and are happy that your wheels are clean, rinse with a steady stream of water. Take a look at our wheel & tyre care guide for a more in depth look at these areas of cleaning.
PREWASH / SNOWFOAM
PREWASH / SNOWFOAM
There are a few stages of pre wash that you can carry out to further clean your vehicle before you make contact with the delicate painted surface. Once you have a solid pre rinse carried out and your wheels decontaminated it's now time to focus on the vehicles surface itself. Firstly, it is good practice to use a dedicated citrus pre cleaner to target clean any fly splatter on the front end and mirror covers to help gently loosen these away from the surface safely. You may also find it beneficial to apply a citrus pre cleaner to the lower half of the vehicle and even the rear end at this time. Once you have applied your citrus pre cleaner, allow this to dwell for a few moments, there is no real benefit from swilling at this time. It is now time to move over to your snowfoam.
Snowfoam's are generally a pH neutral or mild alkaline sulution that are sprayed onto the complete vehicle via a foaming lance setup which once in contact with the surface will help to break down any grime left on the panels. When the snowfoam gets to work it will gently loosen bonded contaminants and slowly and safely transport these down the panels in the suspended foam and off the vehicle. This step is very important because it removes any dirt that could later get caught in your wash mitt and scratch the surface of your paintwork and degrade your gloss levels. Typiclly you will add 100ml of snowfoam to your 1 litre snowfoam lance bottle and then top the rest up with warm water. It’s worth noting here that with a full 1L of solution you should be able to snowfoam at least two vehicles. If you do not have a snowfoam lance, then you could use a kwazar foaming sprayer to apply the snowfoam. Snowfoam should be applied evenly to all exterior panels working from the top to bottom, we are not looking for the thickest foam possible just a good even coverage. You should leave the snowfoam to dwell to allow it to get to work safely lifting any contamination away from the panel for 5-10 minutes, but while you are waiting why not go around the intricate areas like badges and mesh grills with a soft detailing brush. After your dwell time is up or the majority of your snowfoam has made its way down the vehicle, you can now thoroughly rinse the vehicle to remove all of the snowfoam, again do not use very high pressure here, you're simply removing all of the loose product to allow you to carry on with the process. If the vehicle is still lightly soiled, you can repeat this step if you desire. Keep in mind that a good solid pre wash should remove almost all contaminants without you even needing to make contact with the painted surface.

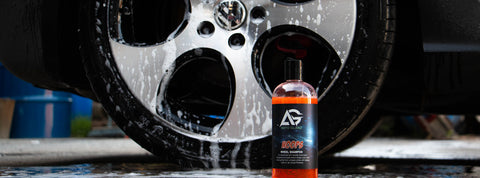
For this step you will need your 2 buckets complete with grit guards. The first bucket will need to be filled with clean water with a grit guard placed into the bottom, place this to one side as this will be your rinse bucket. The second bucket will also need a grit guard and will need to be filled ¾ with water and then add 2-3 caps full of your shampoo, if desired you can now place the tip of your lance into the bucket and pull the trigger to create more suds. You can also add a small amount of shampoo to your wash mitt to help lubricate the vehicles surface. Dip your wash mitt into the bucket and gently stir until the mixture begins to foam. Once you have both buckets ready you are ready to continue with your wash, simply dip your wash mitt into your bucket full of shampoo, making sure not to allow the mitt to sink to the bottom. Once your wash mitt is lubricated in the rich shampoo water mixture, you want to gently sweep across the panels with your wash mitt working in areas roughly 2ft square. You regularly need to rinse well in your rinse bucket, the one with no shampoo added, again make sure not to allow your wash mitt to dip down to the bottom of the bucket, then reapplying the shampoo and water mixture in the second bucket to the mitt and move on to your next area. Repeat this step until you have done every panel. We would suggest washing your top surfaces first, followed by the upper sides of the vehicle, then the rear and bumpers and finally the lower half of the sides and arch lips. You want to leave the dirtiest areas until last so that you do not cause any damage to the paintwork. Once you are happy that you have completed the vehicle rinse thoroughly from top to bottom with a stream of fresh water, make sure to pay attention to anywhere dirt could be building up such as panel gaps and door shuts that may have been missed in the pre rinse stage. See our in depth Two Bucket Wash Tutorial here
DRYING
For this step you will need a high quality, plush microfiber drying towel, You can also use a few spritz of a quick detailer or rinse aid/drying aid to assist by adding lubrication to the surface and helping to build up the gloss. This step is best done panel by panel so that the quick detailer does not dry before you get the chance to dry the vehicle. Apply a couple of sprays of your drying aid to the panel and gently wipe dry with no pressure using your plush microfiber, again some people tend to like to ‘dab’ dry rather than wiping the panel, this is again down to personal preference. If any residue is left give the panel a quick buff. Repeat this process on each panel remembering not to apply to much pressure to the surface. Once finished you should be left with a clean, dry vehicle with a layer of protection on the paintwork from the quick detailer used to aid drying.
FINISHING
After the vehicle has been dried, if you are just carrying out a maintenance wash now is a good time to top up your more simple to apply coatings. Topping up your water repellent glass products to the exterior of all glass so that the glass is protected and going around the vehicle with some quick detailer or a quick sealant if desired. This last stage will heavily depend on the type of work you intend to carry out after your wash (if any) but we would always suggest adding some form of protection after each and every maintenance wash, be it a quick detailer, quick sealant or even a coat of your favourite wax.